Google Cloud Services
This guide will explain how to set up a Linux server running on Google Cloud.
Google cloud offers $300 free credits to new users for a limited time, and it also has "Always free products". See overview and docs for more information.
Before you begin
1) In the Cloud Console, on the project selector page, select or create a Cloud project.
If you don't plan to keep the resources that you create in this procedure, create a project instead of selecting an existing project. After you finish these steps, you can delete the project, removing all resources associated with the project.
Go to the project selector page
2) You may need to enable billing for your Google Cloud project. If you have free credits (see above) then these will be used first. Learn how to confirm billing is enabled for your project.
Setting up a new Server
Start by creating and configuring a new Compute Engine instance.
1) In the Cloud Console, go to the VM instances page:
If this is your first instance you will see a dialog prompting you to create a new virtual machine
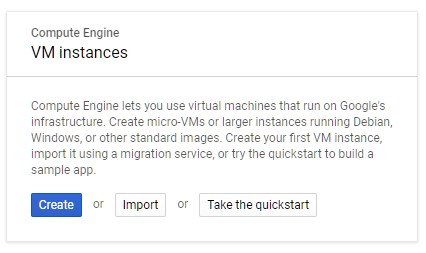
2) Click Create to get started.
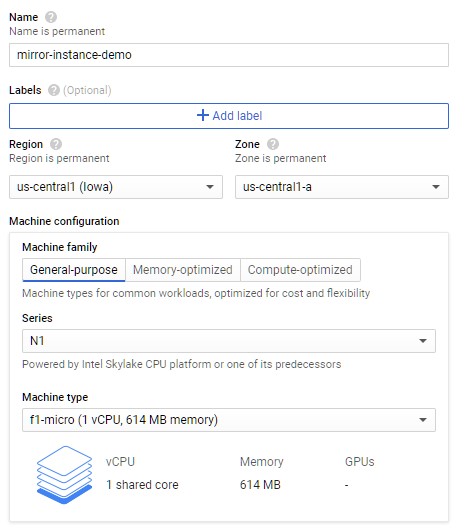
3) On the Create an instance page, configure your instance as follows:
- Name your instance. This tutorial uses the instance name `mirror-instance-demo` throughout.
- Select the region and zone in which you want your instance to be hosted. This tutorial uses the region `us-central1 (Iowa)` and the zone `us-central1-a` throughout.
- Machine configuration depends on the size of your game. For a simple example, we can use a small server.
- select `N1` for series
- select `f1-micro` for machine type
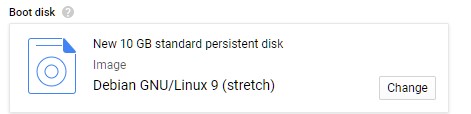
- In the Boot disk section, click Change. The Boot disk dialog will pop up.
- Change the disk type to SSD Persistent Disk.
4) Boot disk can be left as default 10gb standard persistent disk with Debian GNU/Linux 9 (stretch) for this tutorial.
You may want to change it to best fit your needs. You can instead use an SSD or increase its size, however, this will increase the monthly cost.
The monthly estimate should be shown at the top right next to Name.
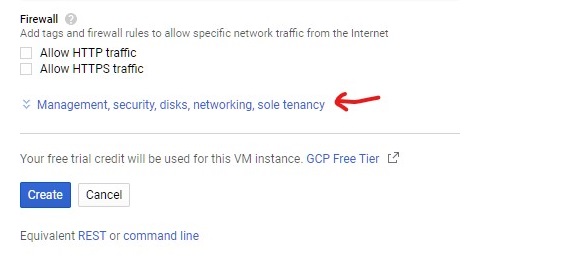
5) To configure Network settings first example the Management, security, disks, networking, solo tenancy section, then click on the Networking tab.
6) Set a Network tag, this will allow you to set up firewall rules later on.
This tutorial use mirror-demo as the tag

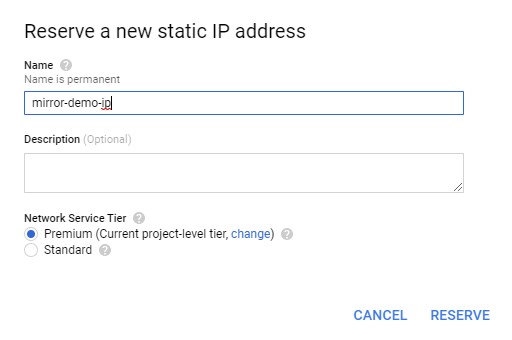
7) Set up a static IP address for your instance
a) Under **Network interfaces** click on `default` and it will bring up a config menu

b) Select the **External IP** dropdown and select `Create IP address`

c) Enter a name for this IP and press **Reserve**. For this tutorial, we will use `mirror-demo-ip`
8) Create your instance.
Press the Create button at the bottom of the page to finish set-up and create your instance
Configure Firewall
This will allow other people to connect to your server using its IP and port
1) In the Cloud Console, go to the Firewall page.
2) Click Create firewall rule.
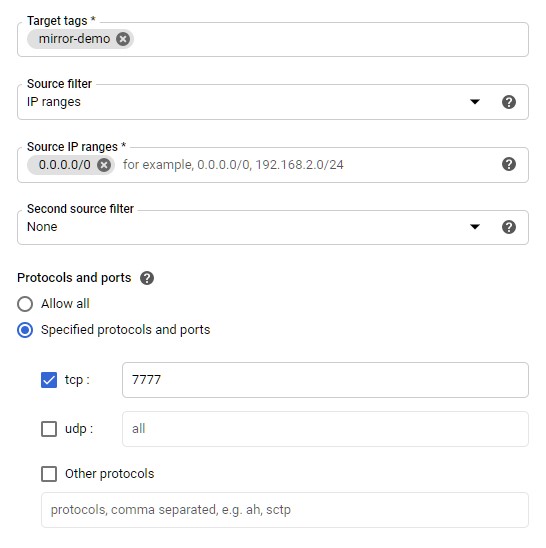
3) On the Create a firewall rule page, fill out the form as follows:
- Name: `mirror-demo-rule`
- Target tags: `mirror-demo`
- Source filter: IP ranges
- Source IP ranges: 0.0.0.0/0
- Protocols or ports: Select UDP, and then enter port 7777 into the field provided.
UDP and port 7777 are the default settings for the socket, if you are using a different socket you will need to find out what settings that uses.
4) Press Create to confirm the setting and create the rule.
Connect to your new instance
Once your instance has finished being created you can press the SSH button to connect to your instance in your web browser

Setting up the Linux instance
When you first connect you will need to set up a few things
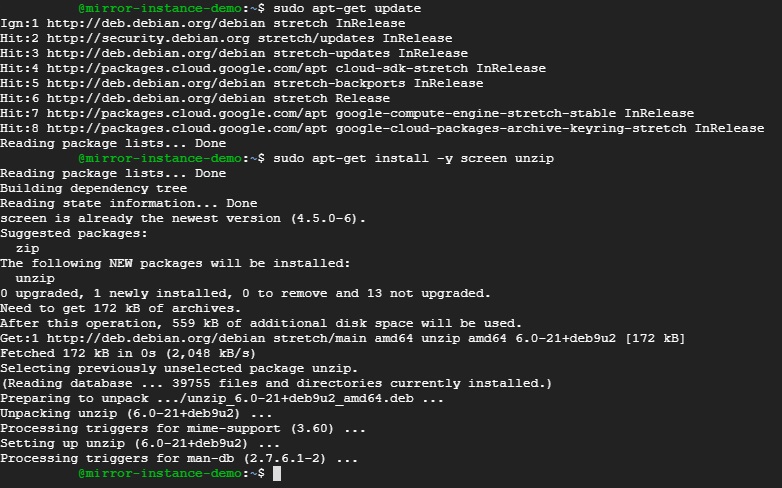
1) First, update the list of packages
sudo apt-get update
2) Install screen and unzip
sudo apt-get install -y screen unzip
screen allows you to have multiple terminals, allows you to do other stuff while your game is running
unzip unzips can be used to extract files from a ZIP file after you upload it to the instance
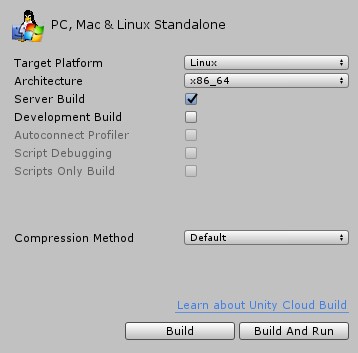
Build your game
Build your game with Target Platform Linux and Server Build ticked
Upload and extract your game
Once you have built your game zip the folder so that you can upload it to your server.
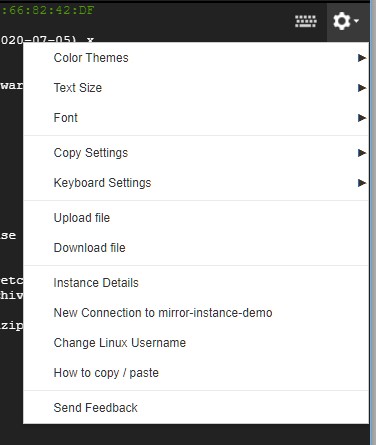
In the SSH connection window click on the settings cogwheel and select Upload File then find and select your zipped build folder.
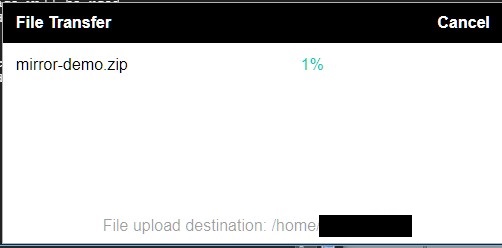
This should upload the game folder to the home directory.
If you need to go to the home directory you can use:
cd ~
The destination will be /home/username where the username should be the cloud account you are logged into.
Once your file has finished the upload you can extract the files
unzip ./mirror-demo.zip
Run server
1) Move into the game folder
cd mirror-demo
2) Mark game as executable
chmod +x ./mirror-demo.x86_64
You should now be able to run your game server!
The following is optional but will most likely be useful
3) Start your server in a detached screen
screen -d -m -S mirrorServer ./mirror-demo.x86_64 -logfile ~/server.log
The parts of the command above:
screen -d -mwill create the new terminal in detached mode-S mirrorServername of the screen./mirror-demo.x86_64your game server file-logfile ~/server.logunity argument for log file location, this will create a log file in the home directory
4) Create a start file so you can start your server the same way each time
a) create `start.sh`
```
echo "screen -d -m -S mirrorServer ./mirror-demo.x86_64 -logfile ~/server.log" > ./start.sh
```

b) mark as executable
```sh
chmod +x ./start.sh
```
5) Run your server
./start.sh
Using Screen
Here are a few useful commands for using screen
- List active screens
screen -ls
- Attach to existing screen,
- process-id is shown when calling
screen -ls - screen name is given by
-Swhen creating the screen, for this tutorial it wasmirrorServer
- process-id is shown when calling
screen -r <process-id | screen name>
Detach from screen press
CTRL A + DStop your game
Once attached to a screen you can press CTRL + C to stop the process, this will stop your game and close the screen
View log files
You can use the -logfile ~/path/to/log.log argument for Unity when starting your game server. This will cause the logs to be written to a file instead of to the terminal. This will means recent logs won't show up in screen -r.
- you can use the
tailcommand to view the end of the log file
tail -n 50 ./server.log
you can use the
-nargument to set how many lines to showyou can use the
-fargument to follow the end of the file stream showing you any new logs that are written to the file in real-time. You will need to pressCTRL + Cto exit follow mode
Clean up after tutorial
If you used an existing project you will need to delete the following:
- VM instance
- Firewall rule
If you have created a new project you should be able to just delete the project.